Hopscotch into 10!

hopscotchMy middle daughter, Melina came home from school the other day and asked me to make an indoor hopscotch for her. Immediately I thought this was an awesome idea and quickly thought of a way to incorporate it into celebrating my oldest daughter, Isabel’s birthday. She was turning ten, so what a perfect way for her to enter the double digit world! We always have a stash of washi tape so I figured that was the best way to make one. I also thought it would be fun to use washi tape to write a big number ten in front of her room so that when she came out in the morning, she’d follow it to the hopscotch in the next hallway. After she got through the hopscotch, her sisters had some gifts waiting for her. It was a perfect way to celebrate her b aefore she headed off to school for the day. I’m letting the girls keep the hopscotch until I get tired of looking at it! It was also a great little addition to her birthday party!Ten! In door Hop Scotch hop scotch gifts

Valentine Treat Plate

candy plateValentine’s day is right around the corner and I thought it would be fun for the girls to make something for their cousins, who also happen to be their absolute bestest friends! They love using Crayola Model Magic at school, so I thought to use that to make their special gifts. The idea was to hand make some small plates out of modeling clay and then fill them with their favorite treats (chocolate hearts, Conversation hearts, etc). The plates can then be reused on a desk for paperclips or on a dresser for jewelry.

Heart Plate

Double Heart Plate

Cat Plate

Lip PlateI simply helped the girls roll out their clay and mold their plate (use parchment paper as a backer to keep the Magic Model clay from sticking). They then either painted a design or used one of the molds to lightly imprint a design onto the plate and then paint it. Using a toothpick, they proceeded to press little red sequins and gems into the plate for added decoration. Lastly, just place the plates somewhere out of the way and allow to fully dry which will take roughly 24 hours.

Add Mold  Coreys Plate

Lips

Materials Used:

  • Magic Model (white). This is a soft, squishy modeling clay material. So fun for little hands. It doesn’t break apart and it’s easy to handle.
  • Lips and Heart molds
  • Acrylic Paint
  • Paint Brushes
  • Wax or Parchment Paper
  • Sequins, gems, beads.
  • Toothpicks (to help push the sequins and gems firmly into place).


Love Plate

Paint

Sequins

Happy Valentines Day!


Visit on Long Island: Quogue Wildlife Refuge

Pond Viewunder a nestWinter, spring, summer or fall the Quogue Wildlife Refuge is a perfect place for a family hike. We discovered it several years ago from a book titledDiscover Long Island”, by (put authors name here). My husband purchased it when our oldest child was born so we could discover new places with her. The book has been so helpful for planning special day trips right here on Long Island, and over the years we’ve discovered some family favorites (The Quogue Refuge definitely being one of them). Its 305-acre preserve has seven miles of trails that we’ve enjoyed on beautiful winters days as well as a budding spring afternoons. We never tire of this place and it’s free! There is so much to discover here, from the outdoor wildlife complex that is the home of several injured birds, owls, foxes, bobcat, and tortoises that the refuge has rescued, to its indoor nature center, where you can discover a  variety of reptiles, freshwater turtles, large insects, Chinchillas and mush more. Inside the nature center there is a spacious room filled with books, a table filled with animal artifacts, and a relaxing seating area with a beautiful view of the pond and surrounding woods. It’s the perfect place to pack a lunch (picnic tables out front) and spend a morning or afternoon.

Lunch Time

They also host a beautiful Earth Day celebration every year that we’ve faithfully attended several years running. Definitely a lot of fun! This year the kids all got a free bag to decorate and Dragonfly Landscape Design gave a free Norway Spruce to everyone who attended! We’ve since planted a few that we received and gave the rest to family members!

Earth Day

Quogue Nature Center

Turtoise

This past weekend we returned for a quiet winter walk and discovered that they added a “story book read along” to one of the trails (absolutely brilliant). The story was the well-known book “The Mitten”, written by Jan Brett. Each page was cleverly mounted into a Plexiglas case and spaced a couple hundred feet apart with arrows directing you along the path. Our kids were literally running from one to the next to be the first one there to read the next page. Their excitement and energy was a testament to how wonderful an idea this story book walk is, and the cases make it easy for the Refuge to replace the pages with the another book every couple weeks.  

Reading along the trail

Reading with daddyMelina ReadingGreat Big Caterpillar Inside Caterpillar IsabelSimply stated: This place is so much fun and you’ll find it hard to leave! I’m sure my children will take their kids here someday!

Find out more at quoguewildliferefuge.org

Schedule: The Refuge trails and Outdoor Wildlife Complex are open every day from sunrise to sunset. The Nature Center is open Tuesdays, Thursdays, Saturdays and Sundays 11 a.m.- 4 p.m.

Homemade Holiday Gifts

holiday-foot-soakimg_7287Merry Feet & Happy Toes (For Christmas and Chanukah)

With so many amazing people in my life, I can’t help but want to give a gift to each and everyone especially during the holidays! Between teachers, neighbors, friends, and that certain someone who just makes me smile, I like to give a little something that says you’ve left an imprint on my heart.

I love homemade gifts! I love making things from scratch and packing them up with special handmade gift tags! It satisfies the creative bug in me especially during a hectic time of the year.

I wanted to give something really special to the teachers this year. With three children now in full day school, the amount of teachers add up and purchasing something really special sometimes can become expensive. So I decided to make something special instead! Teachers are on their feet all day long, so I searched for a homemade foot soak recipe, created my own little tags and wrapped them pretty into a canning jar. We added cozy slip-on socks for the finishing touch! The Recipe for the foot soak is so simple and I altered it a bit but you can find it here.

foot-soak-jar

Here is what you need but first figure out how many jars you’d like to fill and how large the jars will be. So easy to make big batches of this foot soak.

  • 1 pint for large or 16 ounce Mason Jars. The size is up to you.
  • Epsom Salt (I found that Walmart had the best price) I made about 12 large jars and 12 Small jars and used about 4, 3lb bags.
  • Instant Dry Milk. ( I bought about 3 boxes at the supermarket)
  • Chamomile Tea bags. I purchased 3 boxes with 20 bags.
  • Lavender Essential oil ( or any scent you prefer)
  • Ribbon
  • Hole Puncher
  • Decorative Scissor
  • Holiday Scrap Booking Paper
  • Printable Gift Tags
  • Hanukah Gift Tagsgift tags

I used equal parts of Epsom salt and Dried Milk. Added about 20 bags of Chamomile tea bags per Box of Dried milk/ bag of Epsom Salt. I used a little less amount of the Lavender oil that was recommended here. Using a large basin or Tupperware, I mixed all ingredients together and using a measuring cup I scooped mixture into the jars filling it to the top. Once they were filled, using the lids as a guide I traced circles onto decorative scrap paper cut them out and placed them onto the top of the lids and sealed jars tightly. You can print the tags straight onto a thick hard stock. I used a decorative scissor to cut out the tags, popped a hole through them and used bakery string/ribbon to tie the tags around the jars and tah-dah! Merry Feet!

gifts

These make great gifts all year round! Just create a new gift tag for each season.


Eight Nights of Dreidels

a-paper-dreidal dreidal paper-dreidal

I’m actually pretty excited that Hanukah will continue well after Christmas is over. Although the two holidays begin on the same night we still have 7 days of Hanukah left after the Christmas celebration is over. Being Catholic, Hanukah is still one of my favorite holidays to celebrate with my husband and children. This beautiful festival of lights, is a quiet, peaceful holiday, filled with candles burning bright and the aroma of sweet sufganiyot (also known as hanukkah donuts), cottage cheese latkas, potato latkas, delicious soups and of course yummy gelt.

One of my best friends from Kindergarten sent my girls this beautiful wooden advent calendar from KidKraft. The kids have been so excited each day to open one window and find a little surprise awaits them while counting down the days until Christmas. I wanted to find something as exciting for them to do for each night of Hanukah. I found this simple DIY Dreidel template from FamilyFun magazine. I simply printed it out, cut it and used it as a template to make 8 paper dreidels. I happen to have a large selection of srapbook paper and simply picked papers with blues and gold tones. I placed the template over the paper that I chose and traced the pattern onto it. I then cut it out and folded the tabs and taped all of the side’s together. My intention is to fill each one with a special surprise for each of the girls like a little trinket, or a note mentioning a special event we can do for the evening , or a hint to where their presents await them. I’m definitely filling one with gelt and requesting a night of spin the dreidel. Happy Hanukah!

The Holidays Are Here!

Christmas WonderThe holidays are already here it seems. This is an exciting one for me! The girls are bigger and their excitement radiates throughout my home.  These lucky gals get to celebrate Hanukah and Christmas all on the same week! I’m trying hard to come up with fun crafts and projects for both holidays.

DIY Bottle Cap Magnets

bottle cap junkyWe were on a hunt for a couple of quilts for the girls’ beds so we figured we’d head down to Barntique Village and see if we could find something there before paying full price at a department store. Well, it must have been my lucky day because one of the shops had just gotten a couple of quilts in which were pretty much in brand new condition and half the original price. We bought two sets! The woman at the shop was so sweet and of course we started talking. She was enjoying the girls and shared with them a bunch of bottle caps made by her grand daughter. The girls loved them! Not only did we walk out of there with two beautiful quilts but we were also inspired to go home and learn how to make our own bottle caps!

These little caps are so much fun! You can turn your crafty bottle caps into magnets, earrings, hairclips, pushpins,the possibilities are endless. But let me warn you, once you start it’s really hard to stop! We literally made about 50 bottle caps in like one day! There’s four of us so I guess that’s not as crazy as it sounds!

Along with some pretty scrap paper I also chose a couple of  family pictures that I love and printed those to use as well. These also make cute little gifts!

bottle caps

Here’s what you’ll need

Magazine clippings, scrapbook paper, photographs, newspaper, cereal box, or you can even create your own computerized images and print them out

Basic Elmer’s or Tacky glue

Epoxy Stickers for Bottle Cap Pendants, 1-Inch, Clear

Bottle Cap 50 Multi-Pack Bottle Caps

Martha Stewart Crafts Punch, 1-Inch Circle I wasn’t so crazy about this hole punch. But it was good for the price.

3/4  Inch Diameter Adhesive Magnets 54 count or backing of your choice: Clasp, hairclip, push pin etc.


Step 1:
Use your 1” hole punch to cut out circles to fit inside your bottle cap
Step 2:
Use a paintbrush to paint on Elmer’s or Tacky glue on the inside of the bottle caps. Place your circle cut out on top of the glue and press down.
Step 3:
I Placed a 1” Epoxy Sticker over the cutout to protect the image placed inside of the bottle cap. I liked the Epoxy sticker because its so quick and easy and I didn’t have to wait for it to dry. This was also easier for the kids to handle. You can also fill the inside of the cap to cover the photo or paper with Modge Podge Dimensional Magic. Simply fill the cap with the Dimensional glue and let dry for at least 24 hours.
Once your bottle caps are complete, using Gorilla glue or Tacky glue you can attach a little magnet, clasp or hair clip. You can even glue them onto a pushpin!

These make great little gifts!
.

How to make a mini Sukkah for Sukkot

sukkah7Since meeting my husband in 2001, one of my favorite Jewish traditions has been celebrating Sukkot.  I love the fall and this is such a beautiful way to celebrate and give thanks for the harvest even if you are not Jewish! This holiday is usually celebrated in September shortly  after Rosh Hashana and Yom Kippur. On Sukkot, Jewish people remember their ancestors who traveled for 40 years in the dessert by building a temporary shelter called a sukkah. Families decorate their sukkah with fruits and vegetables, gourdes, leaves, twigs.

sukkah8 sukkah10

The Jewish people are expected to spend as much time in the sukkah as possible, eating meals in there and sleeping as well. It is a mitzvah (good deed) to welcome people into your sukkah, as a way for the Jews to remember the way their ancestors Abraham and Sarah welcomed people into their tent.

SukkahsukkahFor the past few years my husband has built a beautiful sukkah made out of wood (picture above was taken before we decorated it with gourdes. Not sure what happened to the after picture!) This year since he was away in Taiwan, I wanted to be able to honor the holiday by having the girls make their own mini versions of a sukkah. Granted, we can not fit inside to eat or sleep in it ourselves but its been great fun letting their little dolls and shopkin’s hang out and celebrate the harvest. There are so many ways to build a mini sukkah. I believe there are many guidelines that must be followed in the construction of a real sukkah, but I let the kids have fun with this. As long as they stuck to traditional materials, and understood the true use of a sukkah I gave them all creative freedom. You can use a shoe box, card board or purchase Styrofoam or use any pieces of scrap wood laying around to build the sukkahs structure. Go hunting for natural materials in your yard to help decorate the top and around your mini sukkah such as leaves, twigs, and acorns. I was also able to find little mini, super tiny, decorative pumpkins in the artificial flower section of Michael’s. You can use tiny gourdes if you can find any small enough! We also used colored paper to cut out little veggies and fruits. The kids absolutely loved creating their very own sukkahs!

harvestMaterials we used to build our sukkahs

  • Shoe Box
  • Acrylic paint (to paint the boxes)
  • Colored paper to cut out fruits and vegetables
  • Inexpensive artificial fall leaves and mini pumpkins from Michaels Craft store.
  • glue dots or tape
  • Twigs
  • String
  • Mini wooden bench and table from Michaels Craft store.

The possibilities are endless! Prepare your structure (sukkah) by painting or using craft paper to decorate the walls. You can leave them plain if you wish. Using glue dots and tape decorate the outer part of your sukkah with your collection of harvest, twigs etc. Add a little table or chairs inside your little sukkah. You can place mini play food on the table and prepare a yummy harvest feast for your little dolls. Happy Sukkot.

Tomato Sauce Making Season

Sauce Season
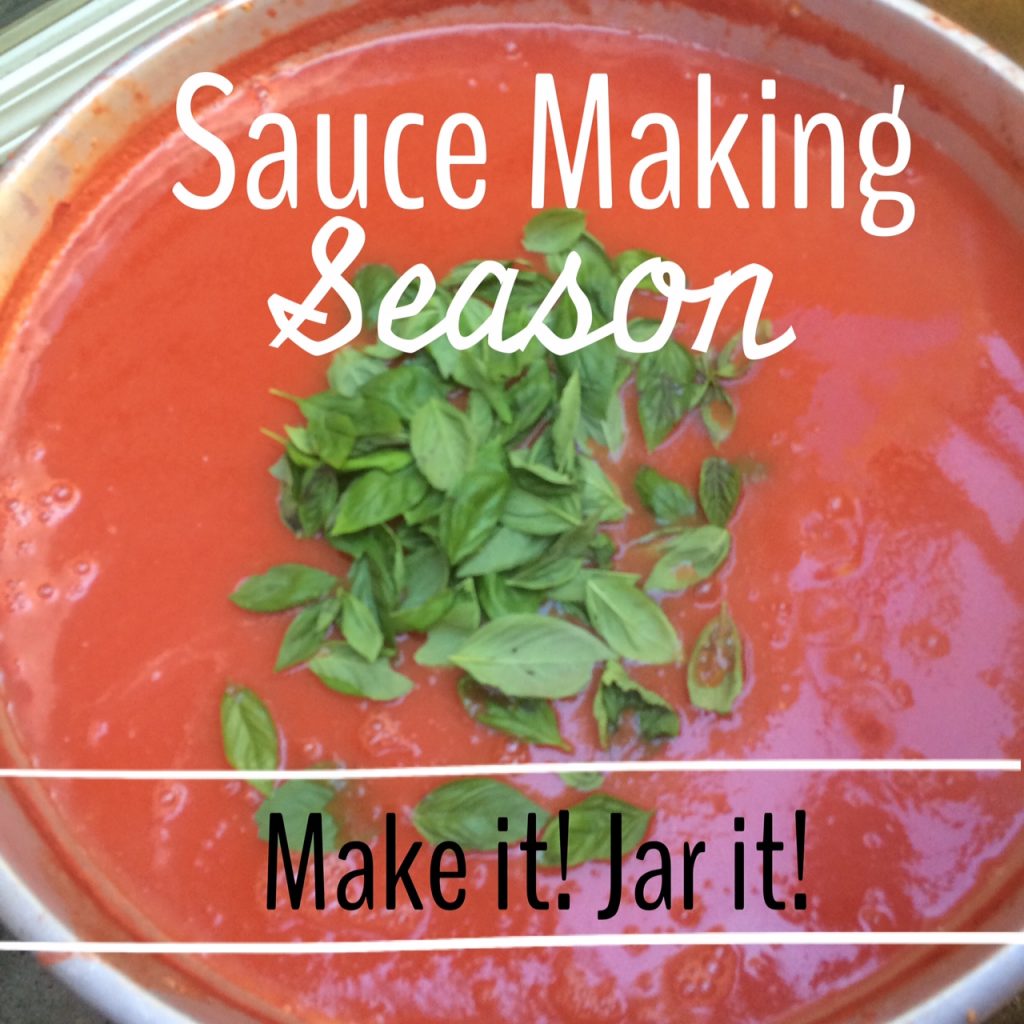
It is my favorite time of year at my mom’s house. It’s a scene that has played itself out for generations in my family – from Sicily, to Brooklyn, to Long Island. The intoxicating aroma of tomato’s cooking with a handful of basil fills the air with pure bliss. Jars waiting to be filled…table cloths covered with hundreds of tomatoes drying in the afternoon sun…my little girls in the aprons that Nonna made wait excitedly in anticipation of getting their little hands involved in every bit of the sauce making process.

NonnoThis year is very different as my dad is not here to oversee the process with his watchful eye, but this tradition keeps him alive in my heart. I can still see him cleaning and chopping the tomatoes, getting them ready to add to the giant pot that sits outside on a burner. His distinguished white hair, soft Sicilian kissed skin, standing under the large umbrella looking over the long table filled with luscious, ripe tomatoes. He’s calm, taking his time, treating each tomato as though it’s the only one as my mom runs around chaotically preparing everything else that goes into making a delicious jar of sauce. With everything he did in his life, he always enjoyed the journey, never rushing to get to the destination.  He made the best of every moment of his almost 95 years. Last year was the final time my dad would be here during this wonderful sauce making tradition, but it was different too. He was already beginning his 8 month journey to heaven. Lucky for him, the bed that he laid in was positioned directly under the window where the boiling pot of tomato’s sit just outside his room. I’d go in and out of the house asking him if he could smell the delicious aroma. He’d smile and say “yes, bahhhhhhh…so wonderful.” I know my dad was able to close his eyes and be right there with us, making the sauce together outside. He didn’t show any sadness. To me it seemed as though he had his fill of enjoying the process and now it was my turn.

fresh tomato's Tomato Chopped Tomato pot Tomato sift tomato boil tomato canned
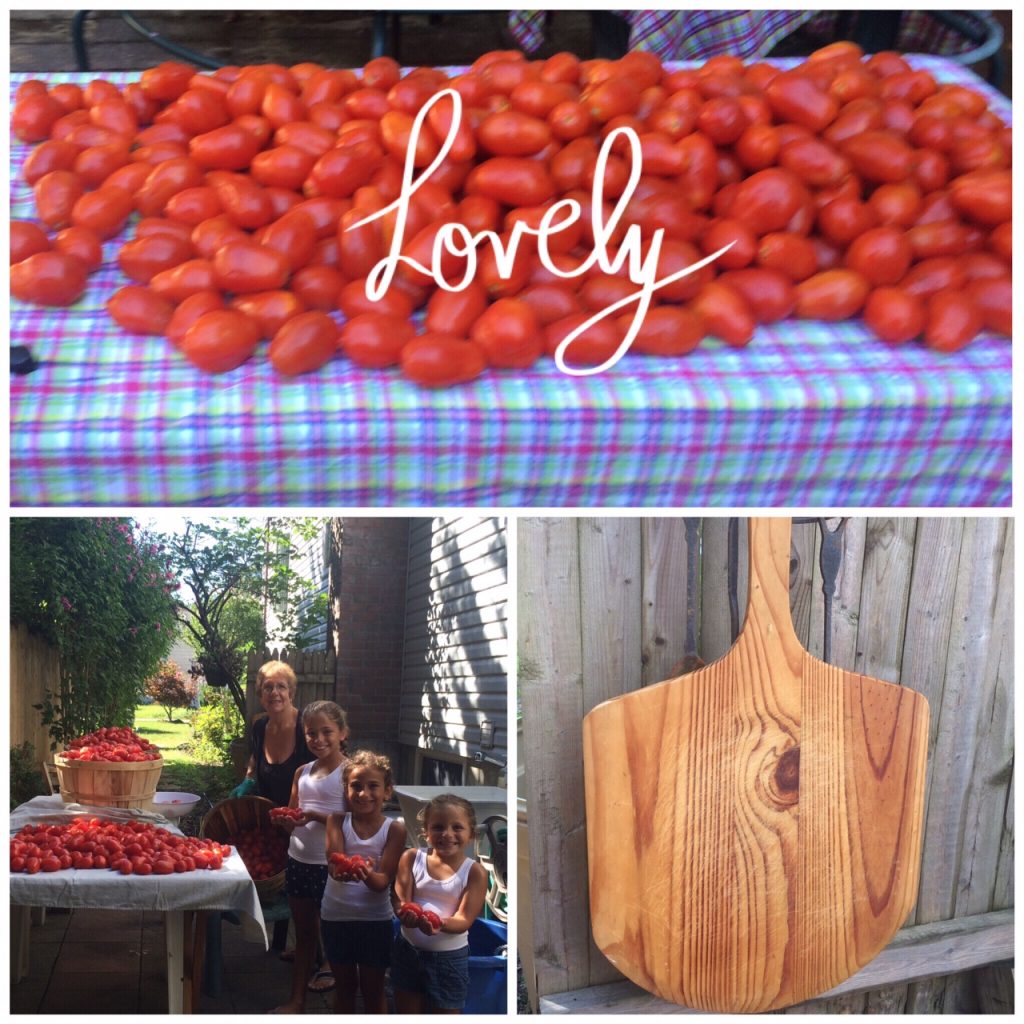
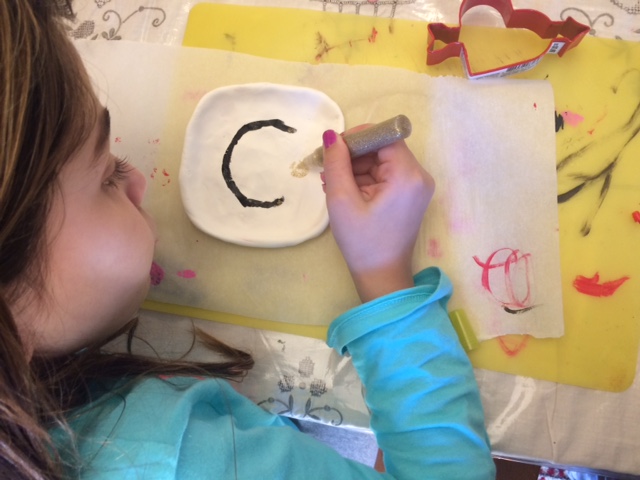
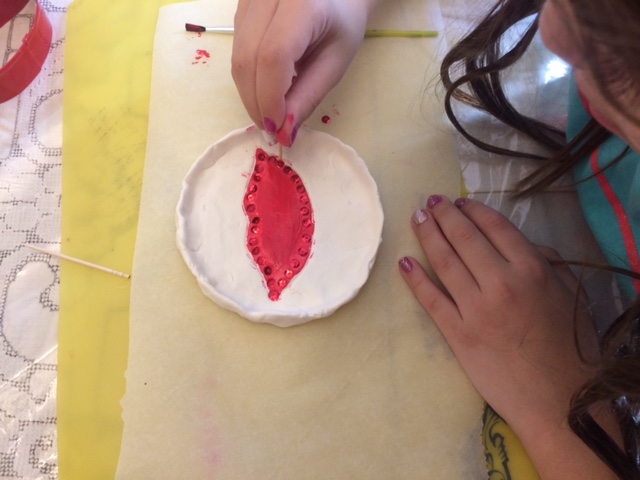
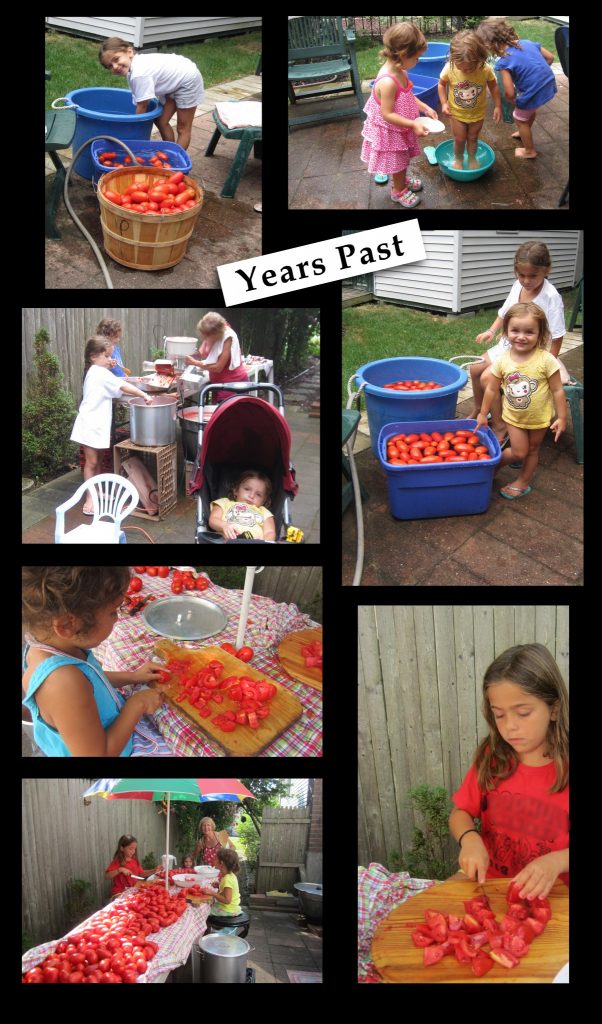
This is a family tradition for us. My parents, siblings, in-laws, nieces and nephews all look forward to this day every year. My girls have been part of the sauce making festivities since they were weee little babies. In the past they were on my hip or taking a nice summer nap in their stroller. As they grew older they would help clean the tomatoes while playing with them. This year though, they were all hands on. At one point there was nothing for me to do as my kids had completely taken over the process. While I missed doing some of the steps, it was quite satisfying just sitting back and watching my own kids go through the process – yet another generation adopting the old world traditions kept alive by my parents, and their parents before them.

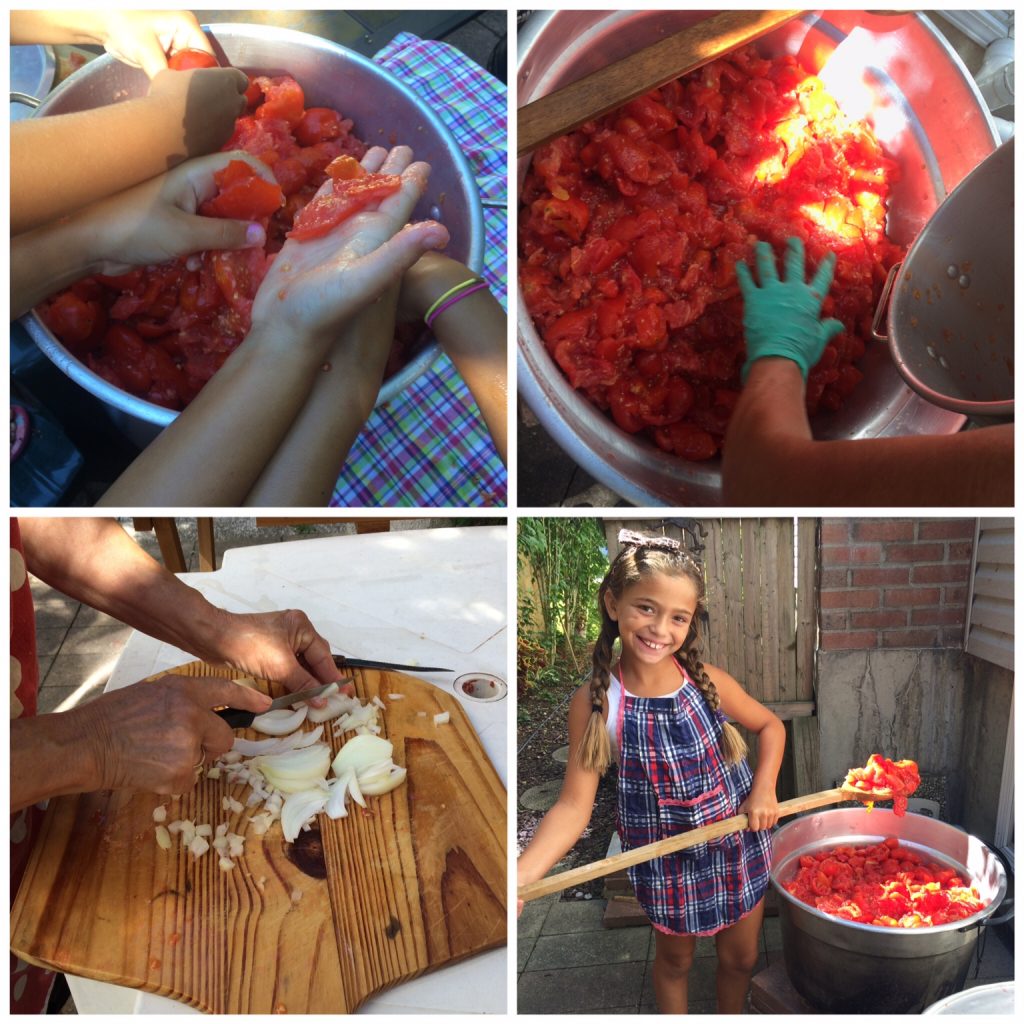
We don’t jar 1 or 2 bottles! We make the tomato sauce on a large scale, some years canning over 200 jars of tomato sauce but this can certainly be done on a smaller scale with fresh grown tomato from your own yard if you choose.

Tomato's past

Here’s the process:

  • We use plum tomatoes (usually between 5 and 6 bushels) purchased from our local farm stands.
  • Usually the end of August or beginning of September is when the tomatoes are ready for saucing.
  • The mason jars need to be thoroughly washed and dried completely.
  • Wash and dry the tomato’s (we wash them outside in big plastic tubs and then lay them out in the hot sun to dry).
  • Using a small knife, cut the tomatoes into fours and then squash them in a large pot with your hands (my kids love this part).
  • Add chopped onions.
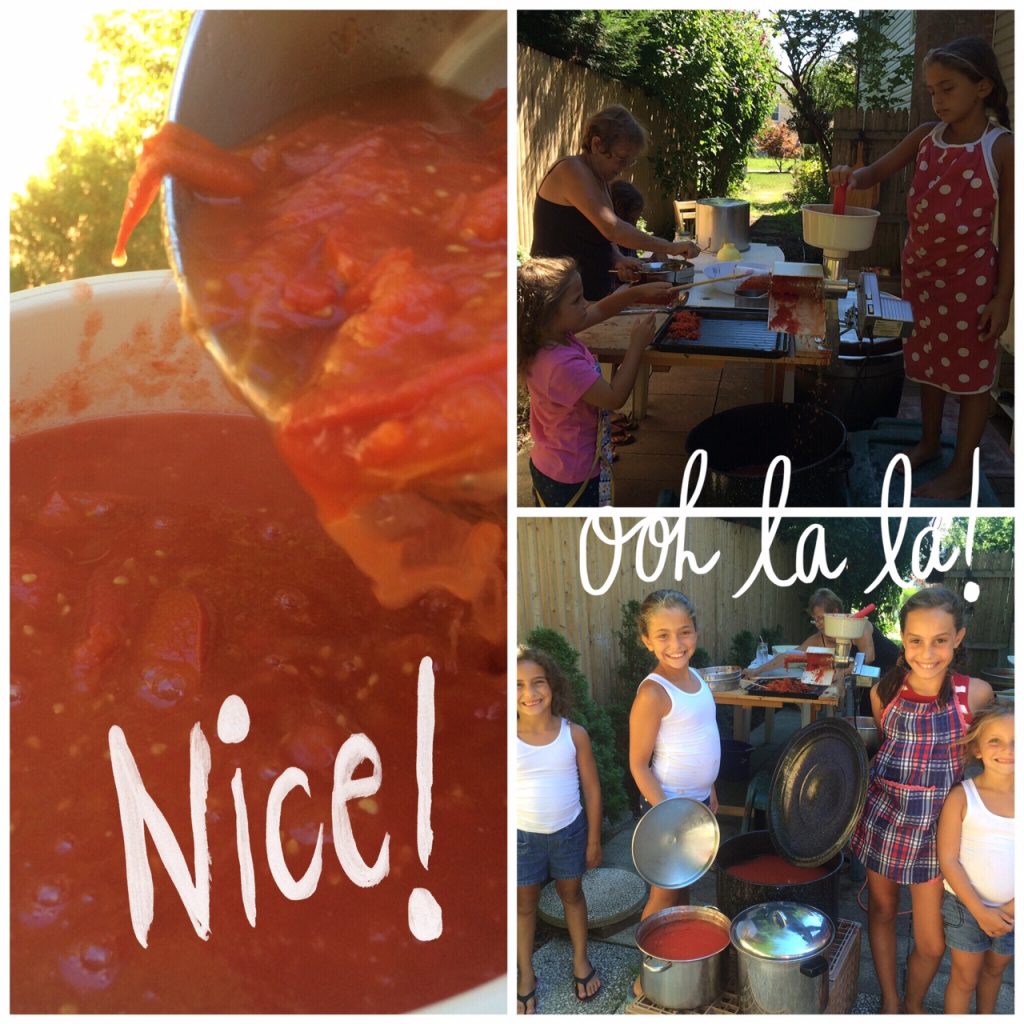
  • Bring to a boil (if your using an enormous outdoor pot like ours this process can take up to 2 hours).
  • Pass tomatoes through Electric Tomato Strainer (This machine helps separate the tomato’s skin and seeds from the juice and pulp quickly)
  • Return pureed sauce back to pot.
  • Bring to a boil once again.
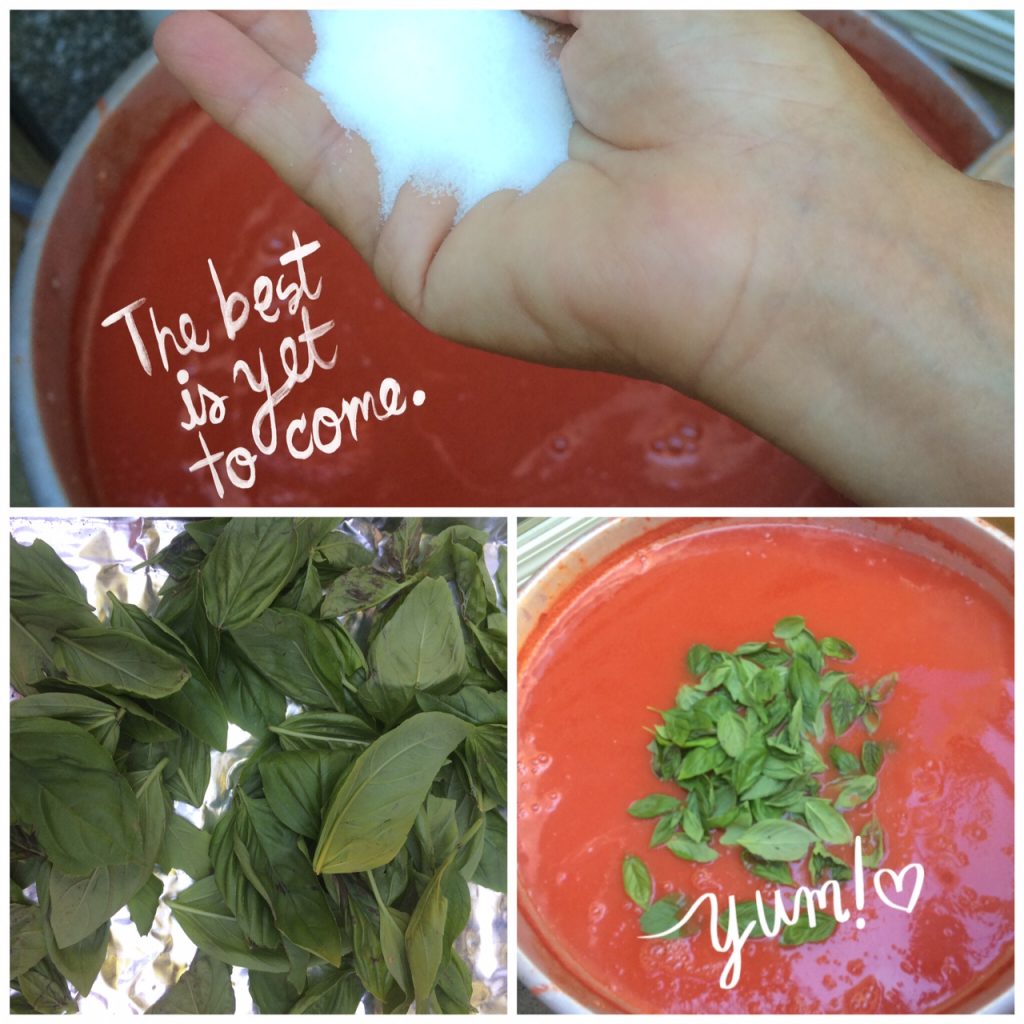
  • Add basil and salt to taste.
  • Scoop sauce into mason jars using a funnel to help the process along.
  • Lid the jars and store at room temperature until ready to be eaten.

This year, I think we did my father proud! He wasn’t here in person, but his memory was stirred up by every red tomato we cut, every single stir of the sauce, every jar we filled, and every lid we turned. He was here.
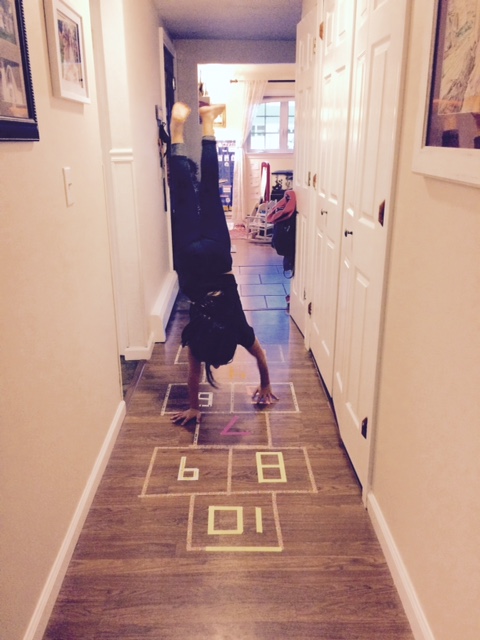
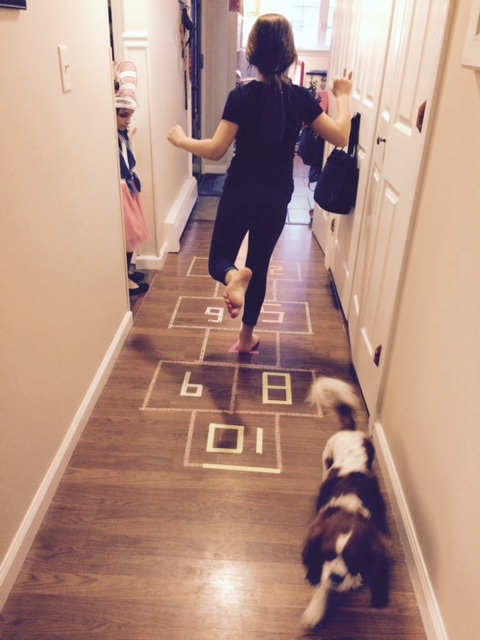
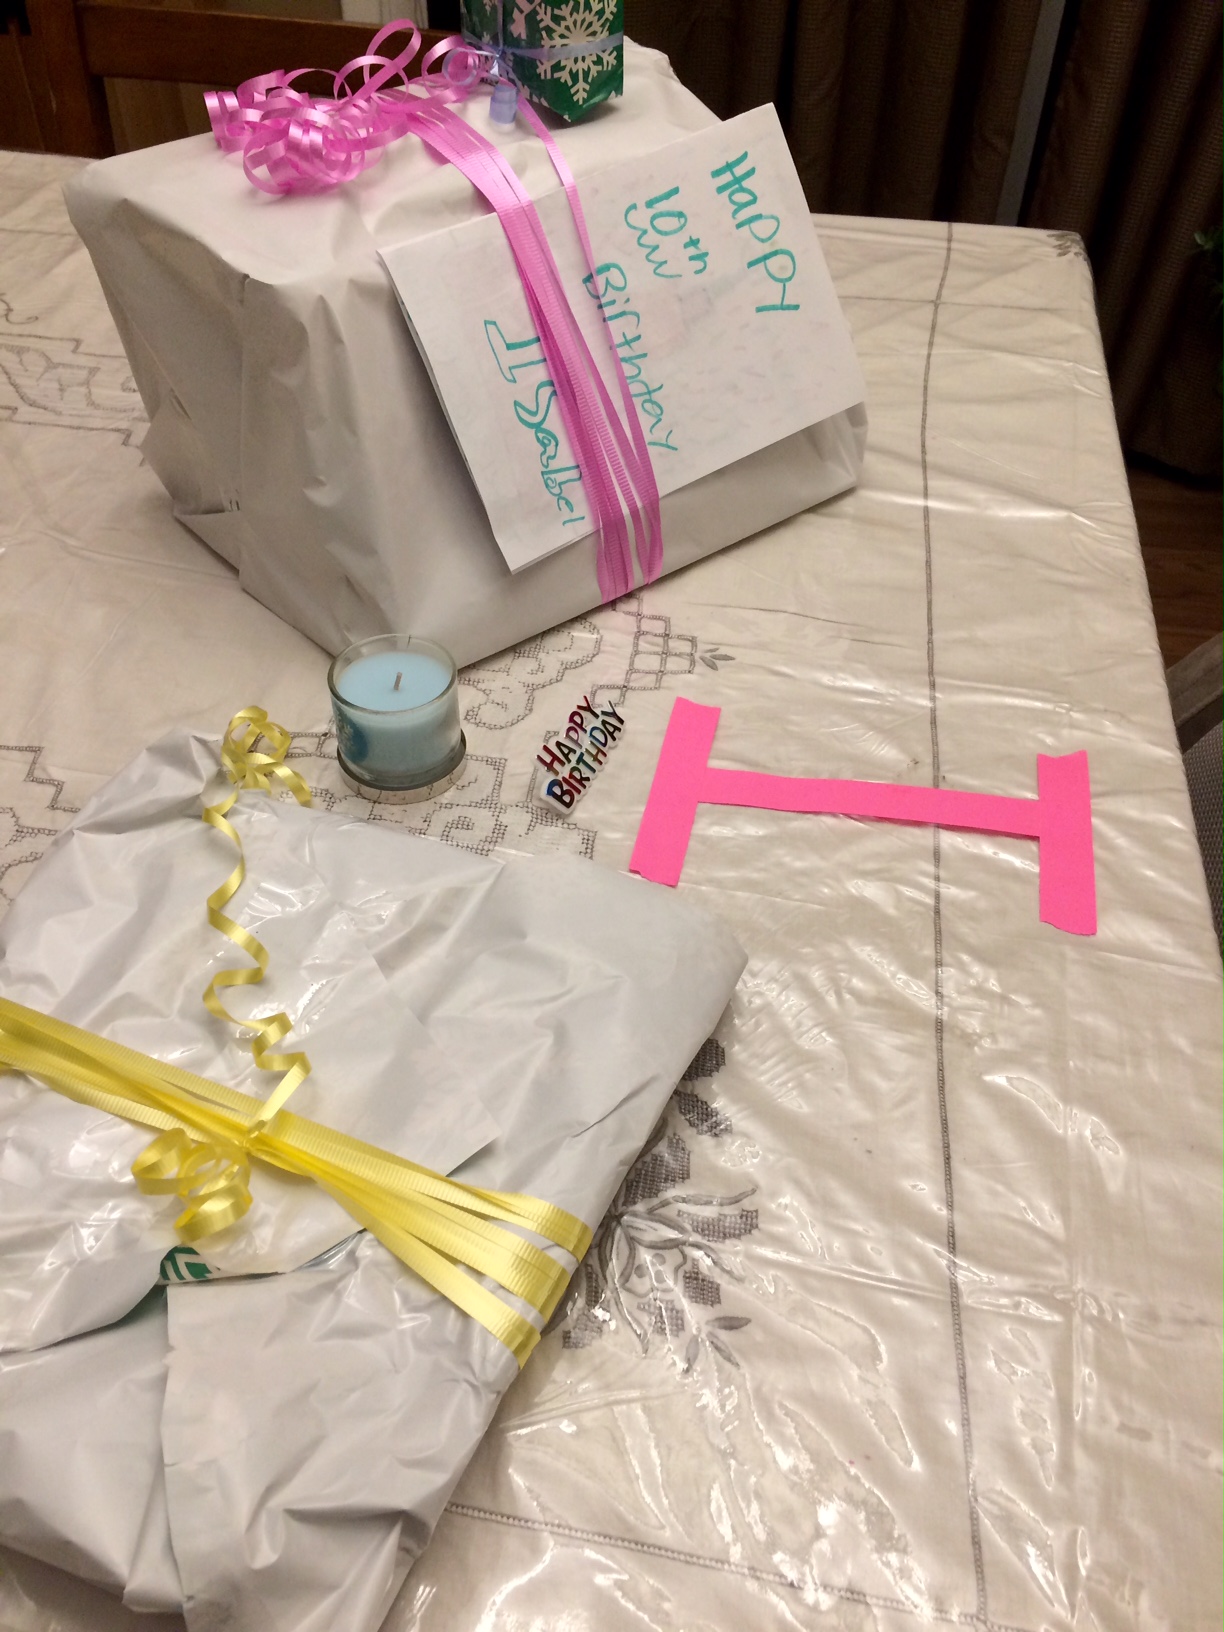
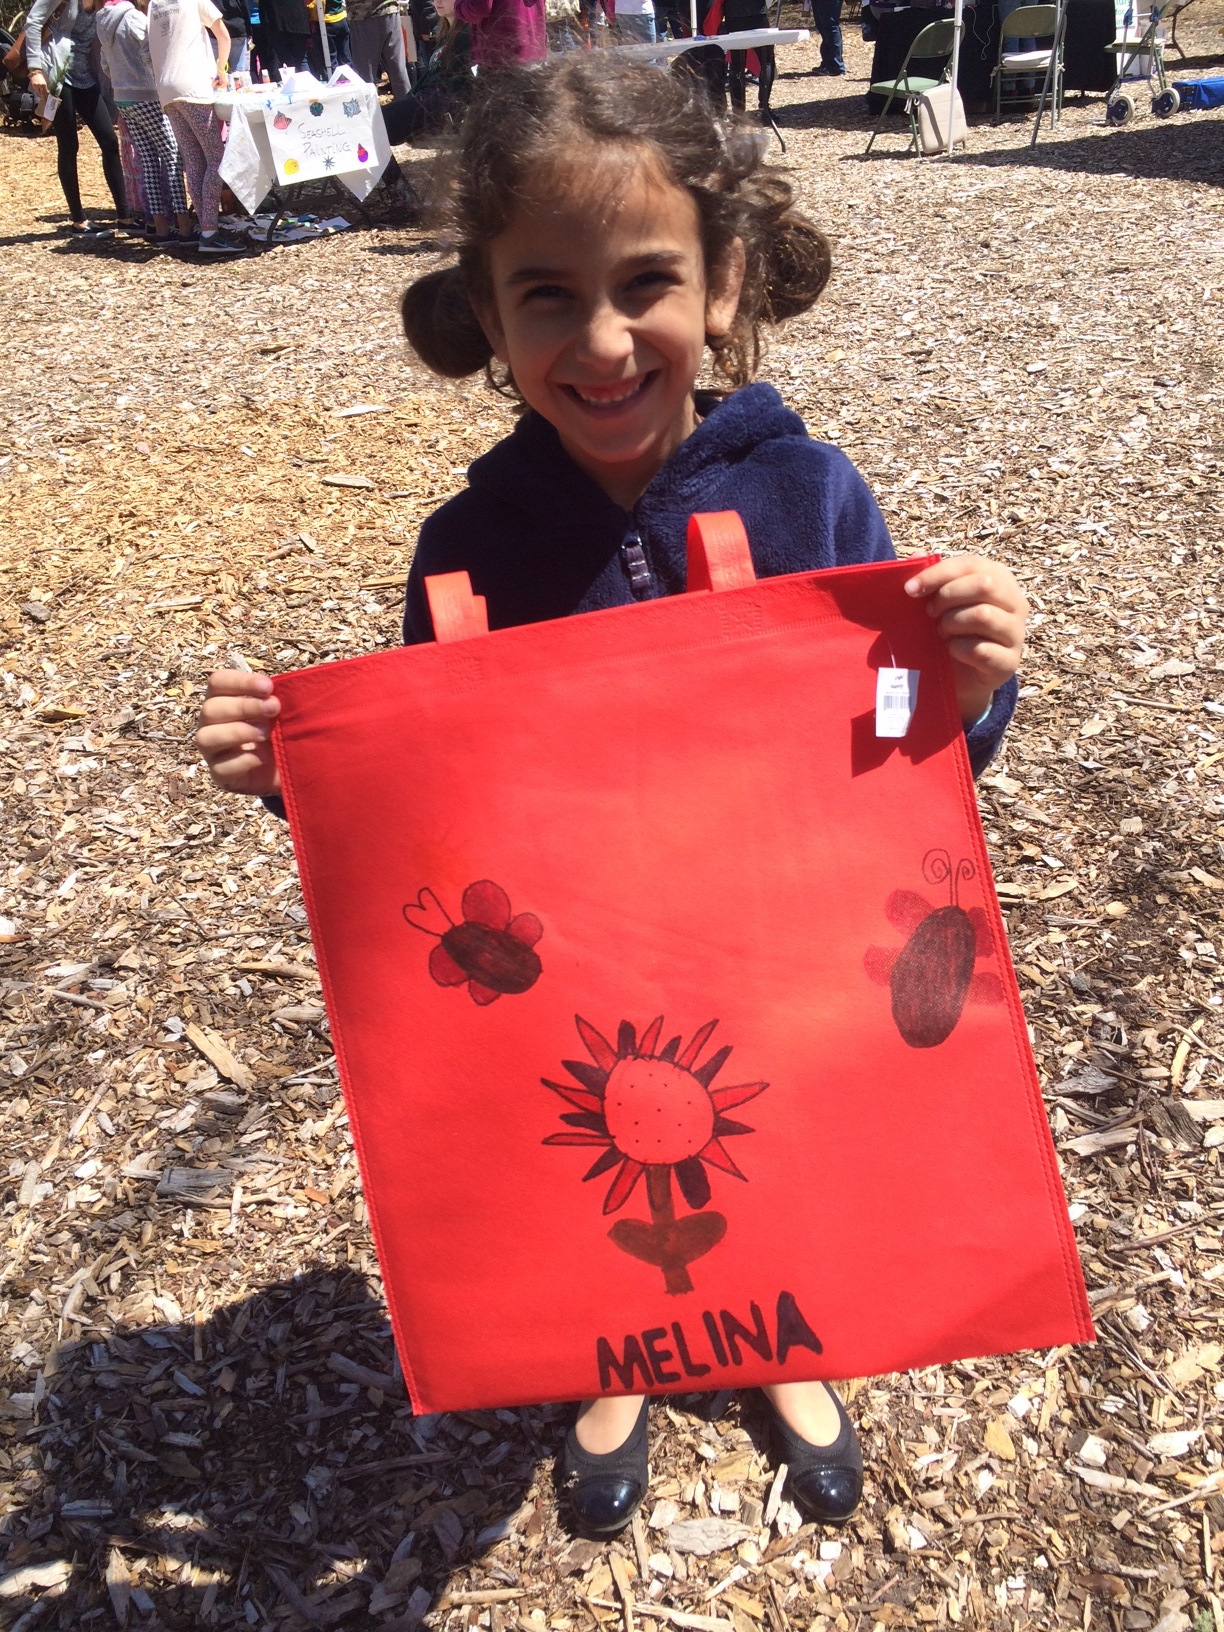
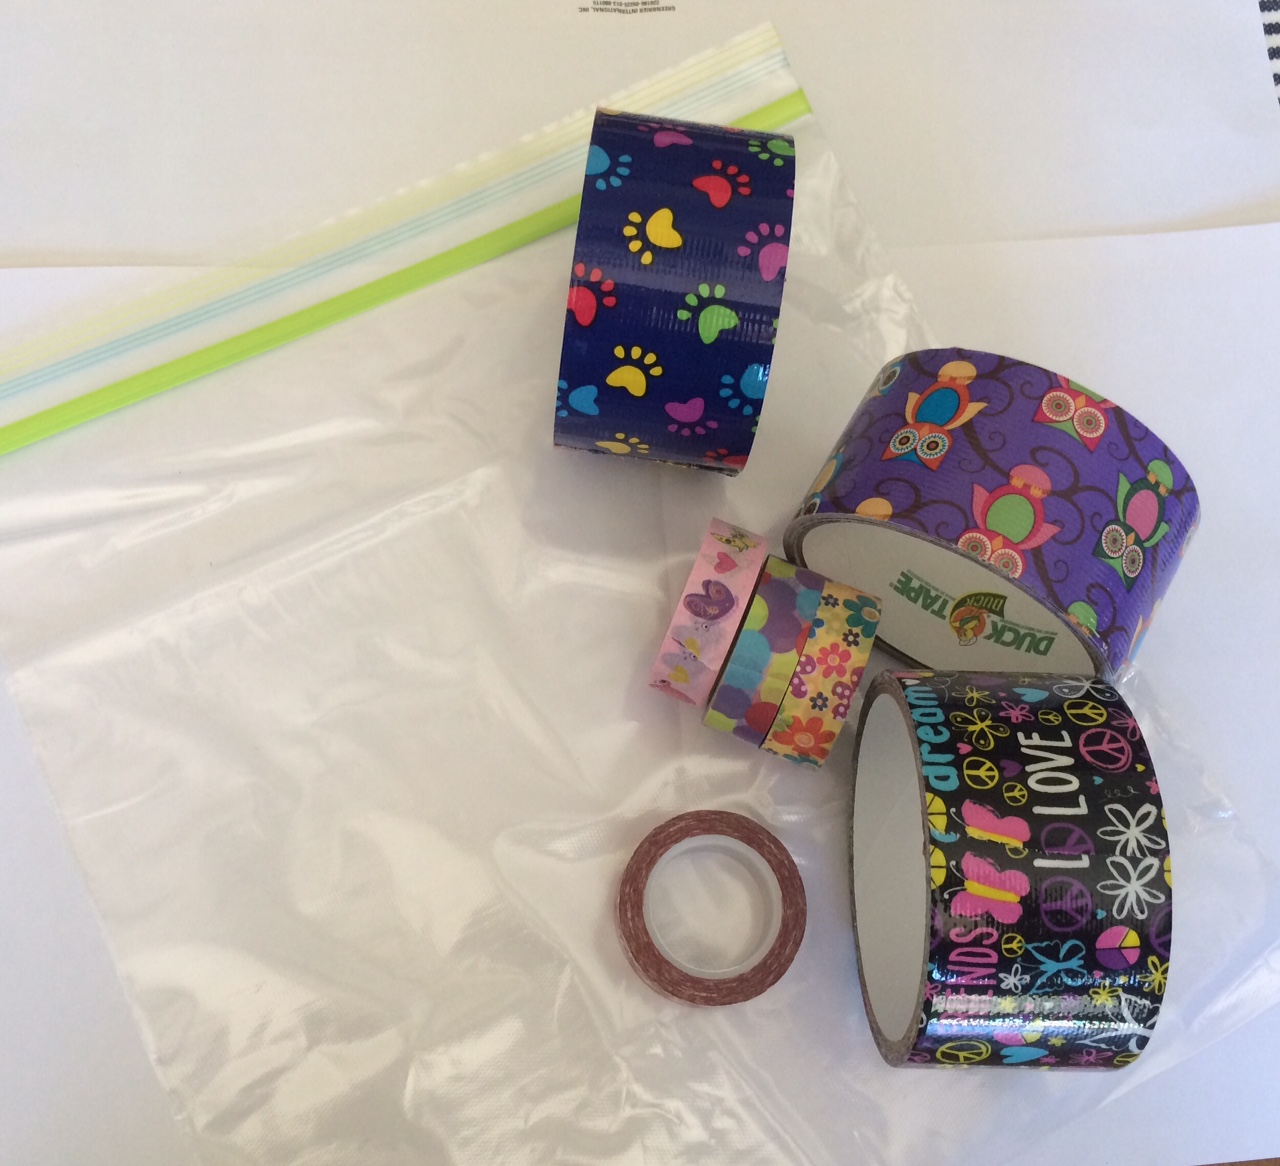
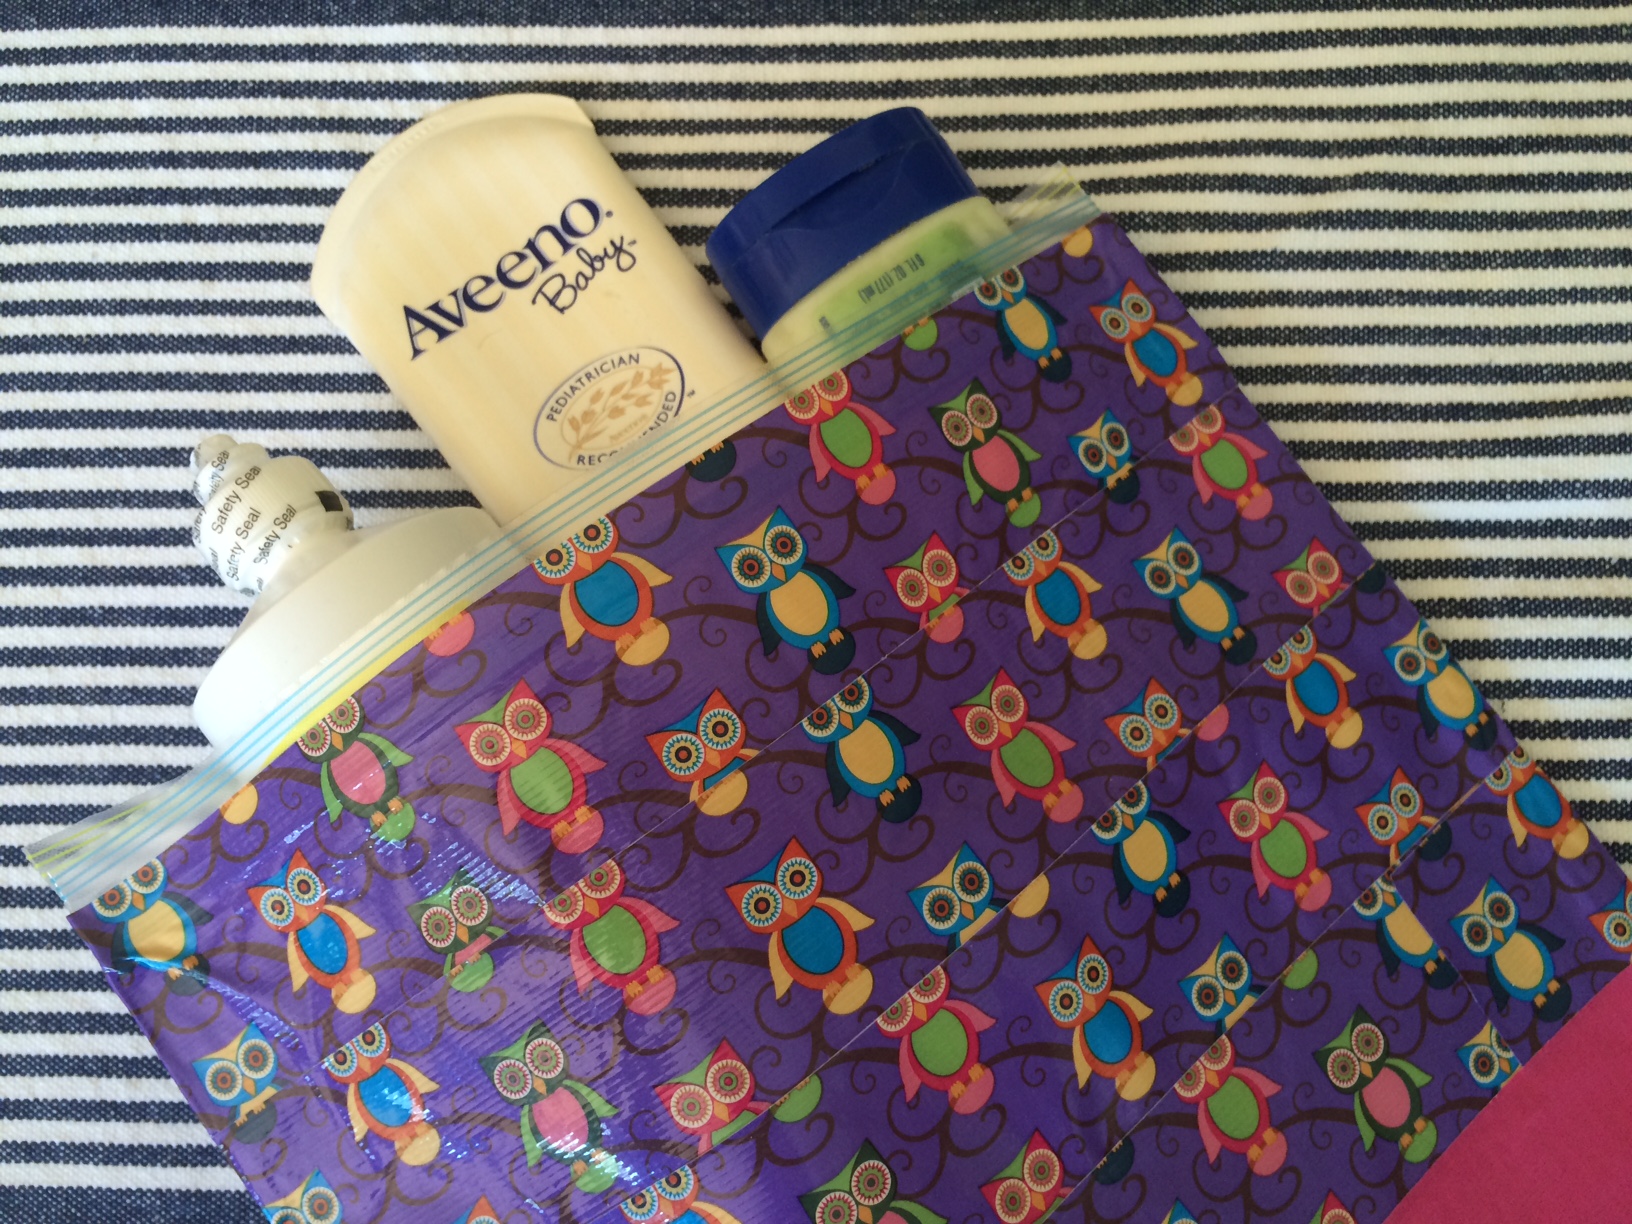
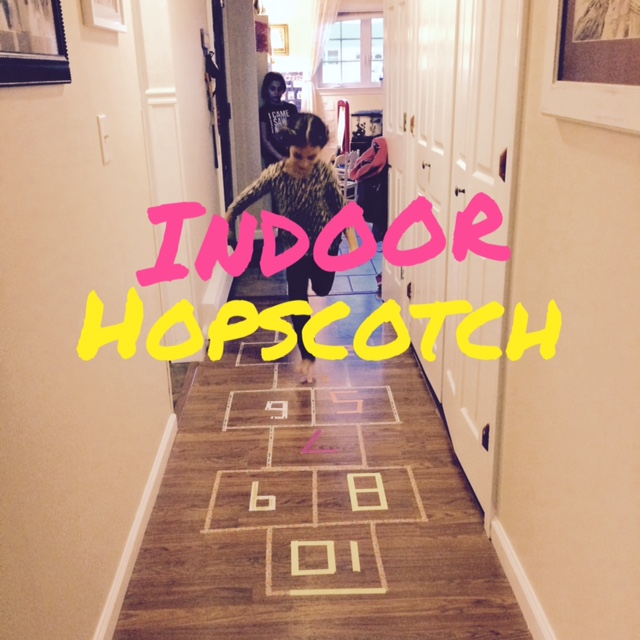


DIY Ziploc Beach Bag

beachbag

If my Isabel could, she would Duct tape our entire home! She’s so creative and so inspiring! She’s constantly taking my Ziploc bags, for all kinds of uses, until I literally run out of them! Grrrr!!! Makes me so crazy sometimes! But this time, she really caught my attention and I was really loving what she used them for. She made her own waterproof beach bag using a roll of Duct tape and a gallon sized Ziploc bag! So simple and so clever! I’m sure there’s many of you who’ve done this before but I’ve honestly never even thought to do this myself. I’ve always wished Ziploc bags were prettier and this is a great and inexpensive way to make a storage bag look wonderful. And it’s so durable and strong. She literally uses it every time we go to the beach or the pool which has been pretty much the entire summer. It fits her change of clothes, a hairbrush, her sunblock and a book. Even the strap has held up!

ziplocbag

supplies duct1In order to make your own, all you need is some Duct tape and a gallon sized Ziploc bag (or a smaller one depending on what you’d like to use it for). She made me a little one that I can put in my pocketbook to carry band aids and Tylenol, etc. All you do is take the roll of Duct tape and start from the top and cover the Ziploc with one strip of tape, going around the front and back of the bag (unless you want to use a different pattern on the back). Let a little piece hang over so you can fold it over. Overlap each subsequent piece by about 1/8”. It should take about 6 strips for a one-gallon bag. These are great for storing sunblock, phones, books, diapers and wipes. They are great for the beach all also fun for everyday use! If you’d like to add on a strap, cut a piece of Duct tape to the length you’d like, fold it (long way) one third of the way, then fold it again the last third and…whallah…you have a strap! Bend it, and using a piece of Duct tape, attach each side to the bag. You could also substitute hot glue as your holding method, but the Duct tape holds up surprisingly well!

ziplockbag